Configure Microsoft Bookings
Microsoft Azure settings
-
Log in to the Microsoft Azure portal at portal.azure.com.
-
Go into your authority's active directory and set up the application registration to be used for MS Bookings. Make a note of the Application Client ID, Tenant ID, and also the Client Secret when you generate it.
-
On the Authentication tab, ensure that the following grants are set:
-
Under Implicit grant and hybrid flows, select Access tokens (used for implicit flows).
-
Under Supported account types, select Accounts in any organizational directory and personal Microsoft accounts.
-
-
On the API permissions tab, ensure that all 10 Microsoft Graph permissions do not require Admin consent.
-
On the Owners tab, set up the owners who will have access to the portal application. Each user must have an Office 365 account that will be used by ASSURE to log into MS Bookings.
-
Once the owners are assigned, click the Enterprise Applications link, just above the list of owners.
The Enterprise application opens, displaying the owners.
-
On the Properties tab, ensure that User assignment required is set to No.
-
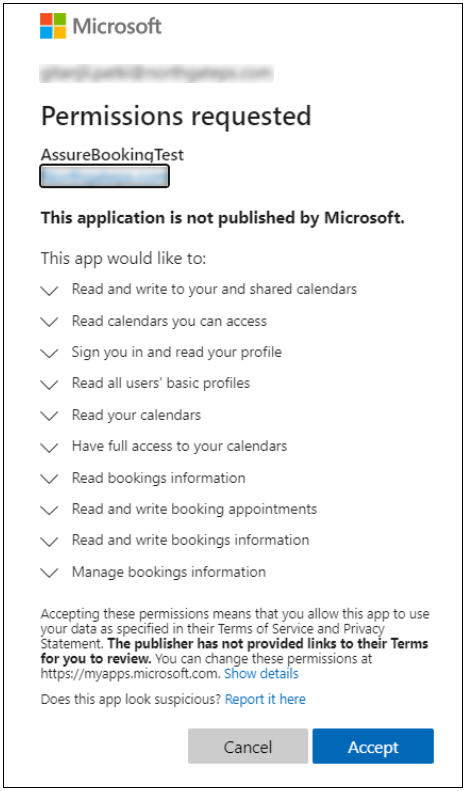
Each of the owners needs to give consent, to be able to access the APIs in the booking application. To do this, they must:
-
Navigate to this URL:
https://login.microsoftonline.com/tenantId/oauth2/v2.0/authorize?client_id=clientId&response_type=code&scope= https://graph.microsoft.com/.default&prompt=consent
replacing tenantId and clientId with the Tenant ID and Application Client ID mentioned earlier.
-
Log in with their Office 365 user name and password, and follow the instructions.
Once they have clicked on the confirmation window, their user id can be used by ASSURE to log into MS Bookings to make the API request.

-
-
Return to the Enterprise application, and on the Permissions tab click the User content sub-tab.
-
Click each link in the Granted by column to confirm that the users' consent has been received for each API.
Microsoft Bookings settings
-
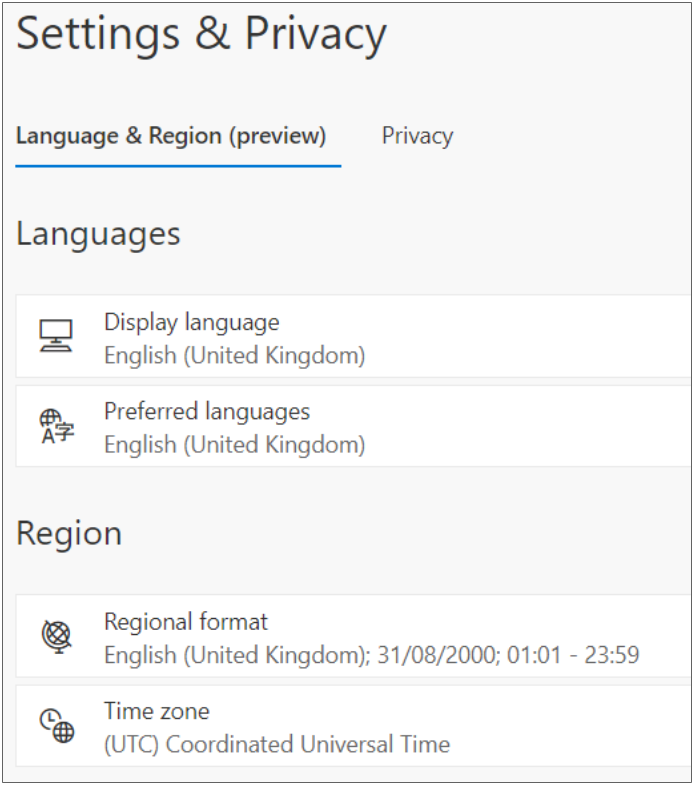
Log into MS Bookings and click the Settings icon in top right corner.

The date time format should be set appropriately for your region.
-
Set up a business in Outlook Office Bookings.
-
Set up services required in the business with the description and duration. Set up the publishing options and the scheduling policy. Decide whether customers are allowed to choose a specific person for the booking. Assign staff to the service.
-
Add assignable staff to the business.
-
Choose if they are Administrator, Guest, or Viewer. Also set up their working hours and whether events on their calendar affect their availability.
-
Once the staff is set, in the Membership information, send them an email if they are bookable.
The staff will need to log into their Office 365 email account and click on the link to allow themselves to be bookable.
-